Navigation
Twitter Feed
Tweets by @MeridixSupportHow To Capture Offline Audio or Video To Your Computer (Non Streaming)
There are probably times where you'll want to capture video to a file on your computer instead of streaming live. For example, you may want to capture video of an interview for playback later, capture footage for further editing, or even capture an entire game at a venue without any internet access (and upload it later to Meridix, like tape delay).
While the procedure below is certainly not the only way to go about this, we think that using Adobe's FMLE is a simple way to capture video to files on your computer without streaming. Here is how to do it:
1. Be sure to connect and turn on any microphones/cameras or other equipment you'll be using.
2. Open the Flash Media Live Encoder (FMLE) software, and you'll see the main options screen.
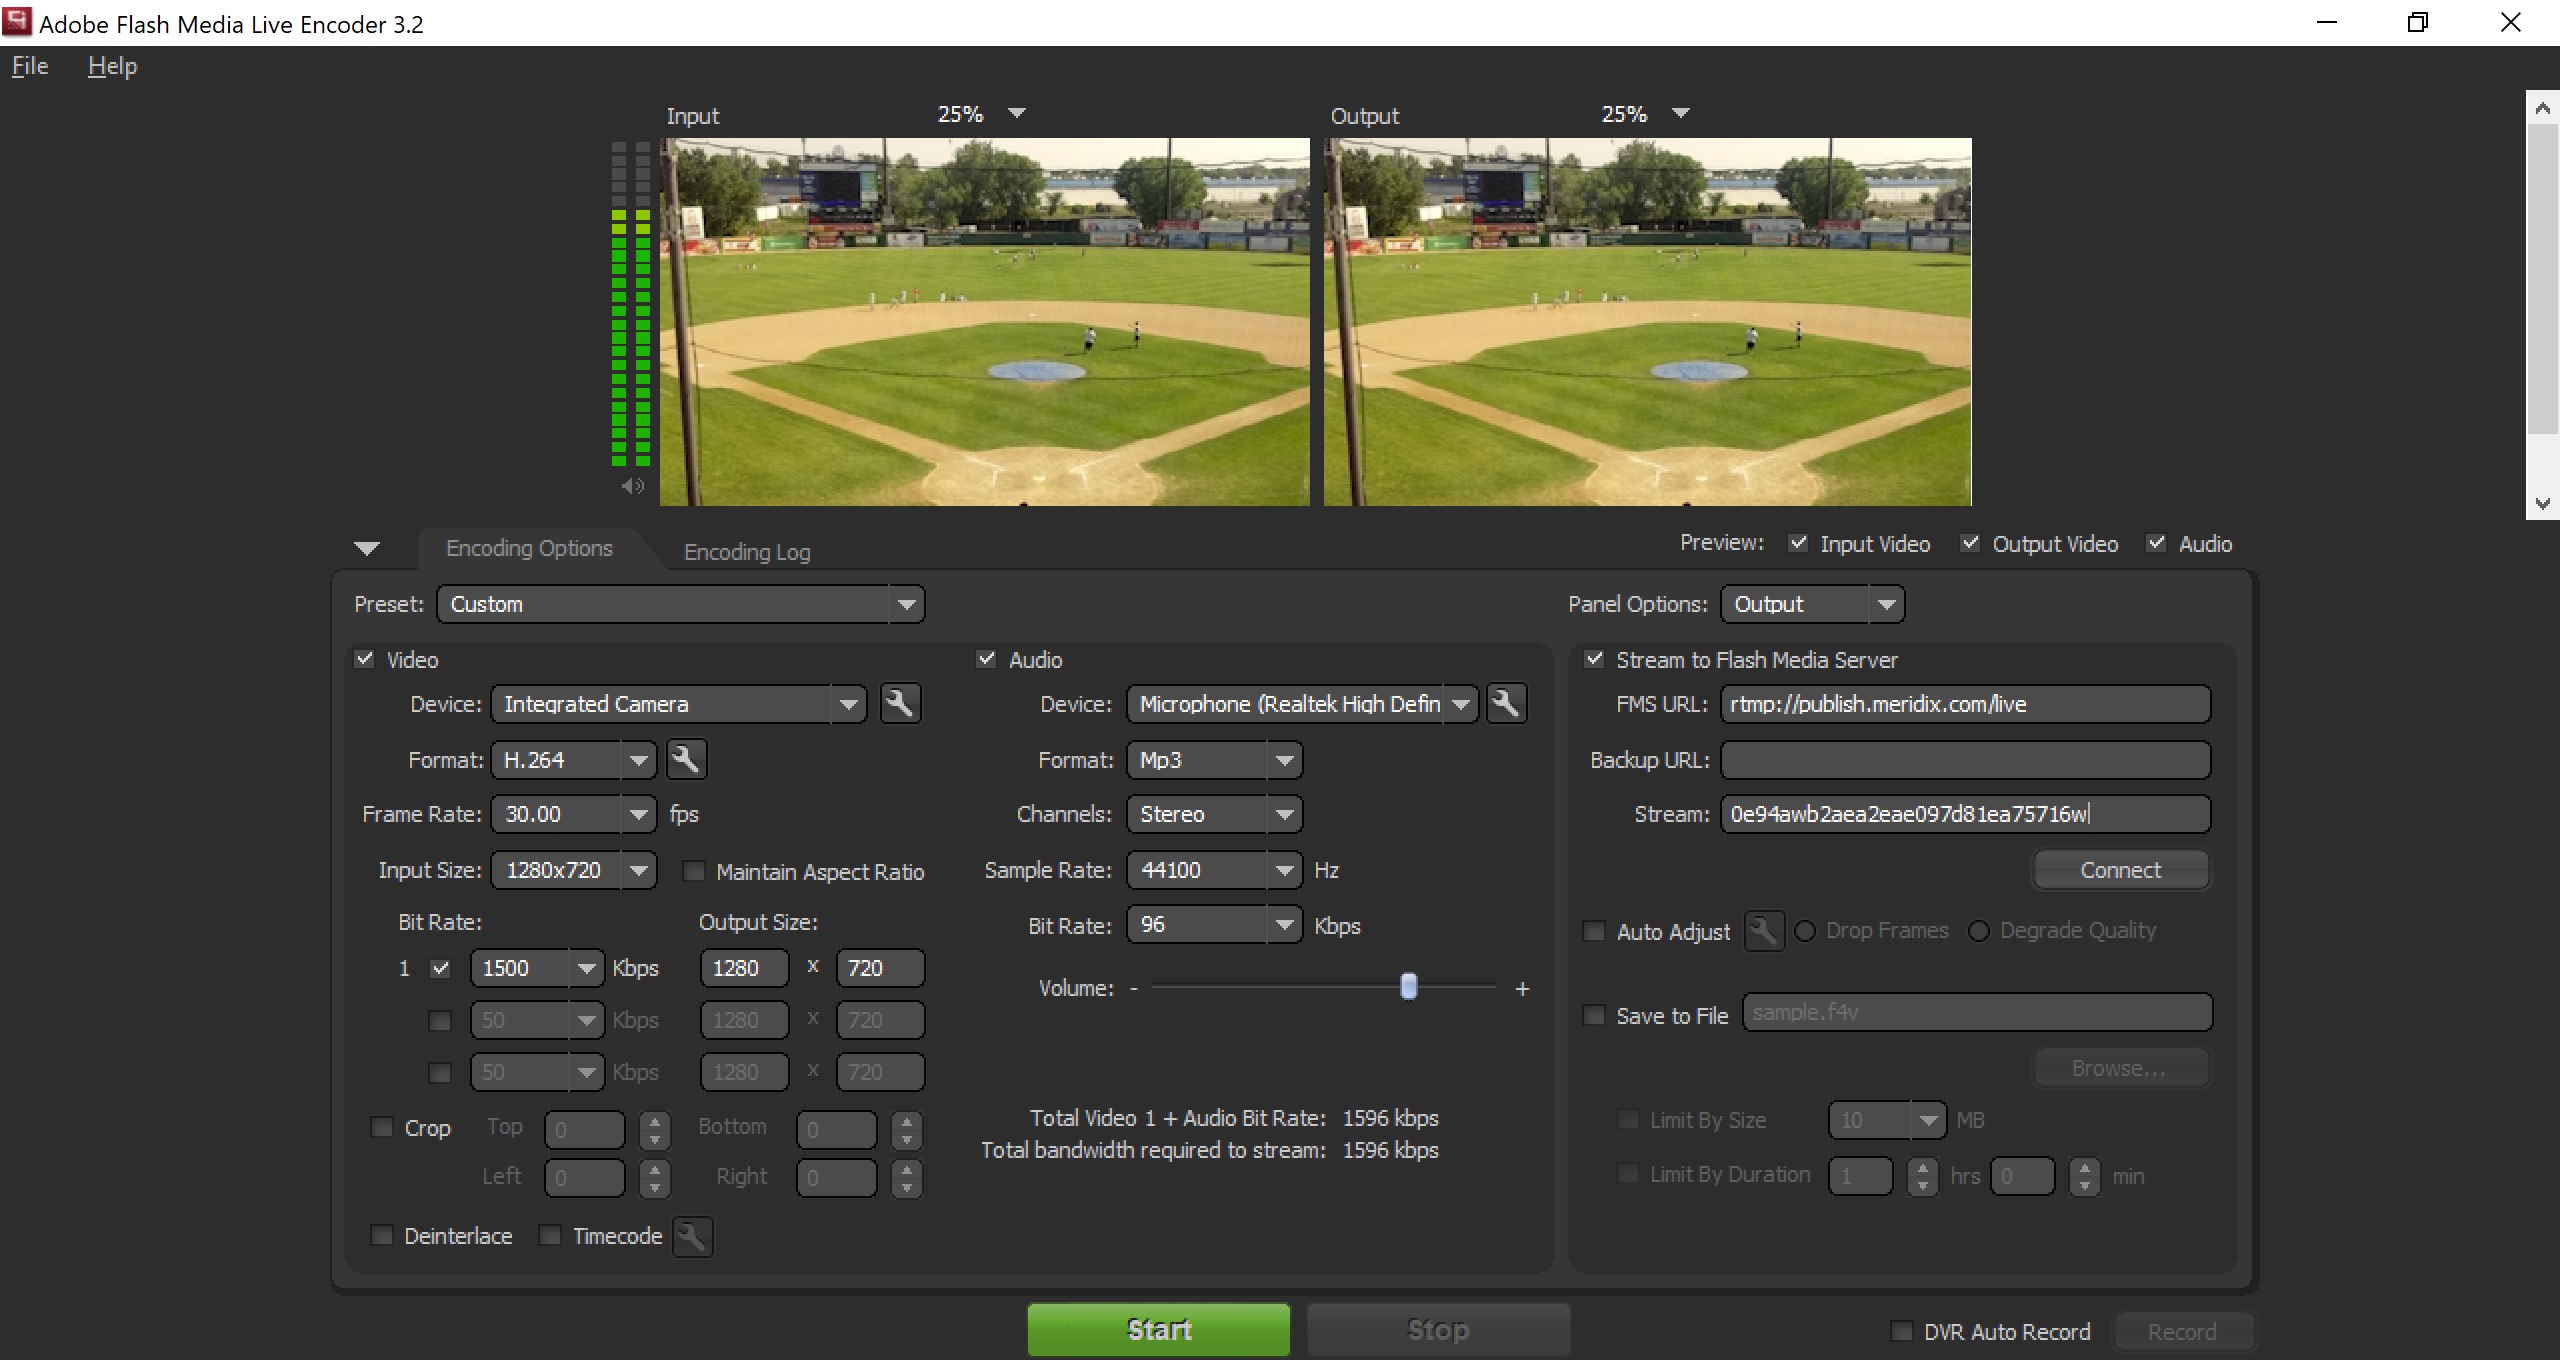
3. If you are capturing audio only, UNCHECK the "Video" checkbox and the video options should gray out. If you are capturing video and audio, then leave both the "Video" and "Audio" checkboxes checked.
4. For offline capture you can use whatever settings you desire, but we recommend the following:
Video Settings
Device: (select your camera if not already selected)
Format: H.264
Click the wrench icon next to Format.
Advanced Encoder Settings
Profile: Main
Level: 3.1
Keframe Frequency: 5 seconds
Click OK
Frame Rate: 29.97
Input Size: 640x480 (or others, depending on your CPU), maintain aspect ratio should be checked
Bit Rate: Only 1 should be checked, 500 Kbps, and Output Size 640x480 (or others depending on your CPU)
Audio Settings
Device: (select your microphone if not already selected)
Format: MP3
Channels: Stereo
Sample Rate: 44100 Hz
Bit Rate: 96 kbps
4. Since you don't want to stream live, UNCHECK the checkbox on the right side that says "Stream To Flash Media Server". The FMS URL, Backup URL, Stream, and Connect button should all gray out.
5. Ensure that the "Save to File" checkbox is CHECKED, and then specify a filename to save your file as. You'll likely need an f4v extension, such as "Redhawks_Game_5.f4v". You can also click on the "Browse" button to specify where you want the file to save on your computer.
6. Click on the green "Start" button and you'll immediately begin capturing audio or video. When you're done, click on "Stop".
7. If you don't change the filename in between sessions, FMLE will automatically rename your file with an appended number, such as "Redhawks_Game_5_2.f4v", "Redhawks_Game_5_3.f4v", "Redhawks_Game_5_4.f4v" and so on so that nothing gets overwritten.
8. When you're done, simply close FMLE and the .f4v video files you captured should be in your Videos folder on your computer, or in the folder location you specified using the "Browse" button.